I’ve been using InstaMAT for nearly a year, and I’ve been facing a similar issue.
At the moment, when I want to mask merged objects individually, I handle it before exporting the 3D model by either assigning separate Vertex Colors to each part in advance or separating them into different UV islands.
This is a good workaround, but I would like to keep the vertex colors untouched. My model is for the Godot game engine, where I need the vertex colors for shader FX.
However, I found a workaround by using “Mesh Normal Mask” layers in InstaMAT. Handling multiple elements is a bit tedious, but in my case, it’s great for masking submeshes.
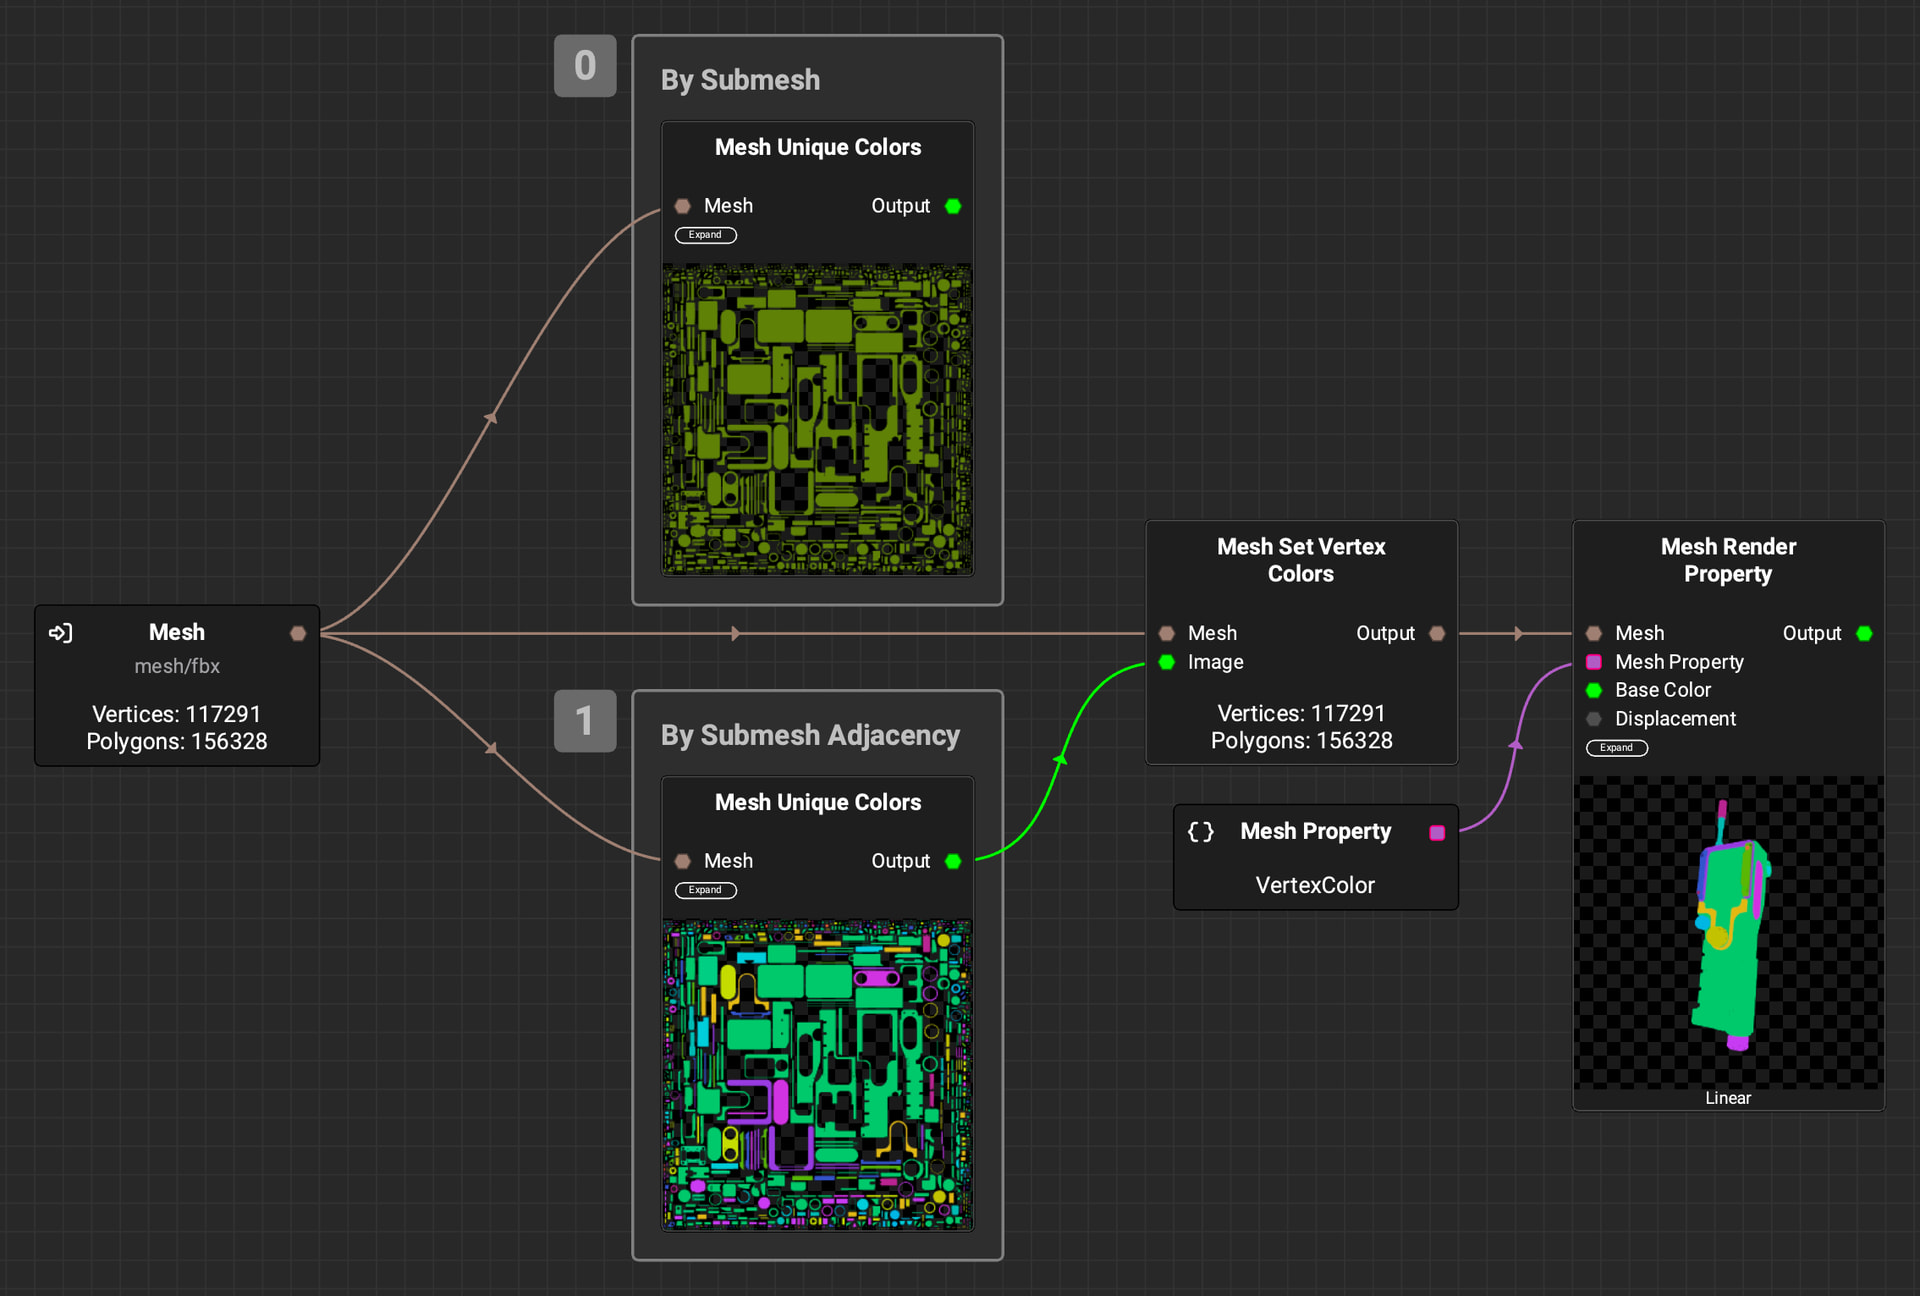
Yes, you can generate unique vertex colors for all parts of a combined mesh using Submesh Adjacency with the Mesh Unique Colors node. You can then assign those vertex colors to the mesh with the Mesh Set Vertex Colors node. You can then bake those vertex colors to create ID maps as needed. You could export the new mesh with those vertex colors assigned, or use the Mesh Bake node directly in the graph to generate the ID maps.
If you have any questions, feel free to reach out!
Yes, I have a question:
How do you switch to the graph mode when you’ve already started to paint a mesh? I’m new to InstaMAT and have no idea how to do what you explained.
Do I have to open a new project inside the package?
If you have a link to a quick tutorial explaining this workflow, please post it here.
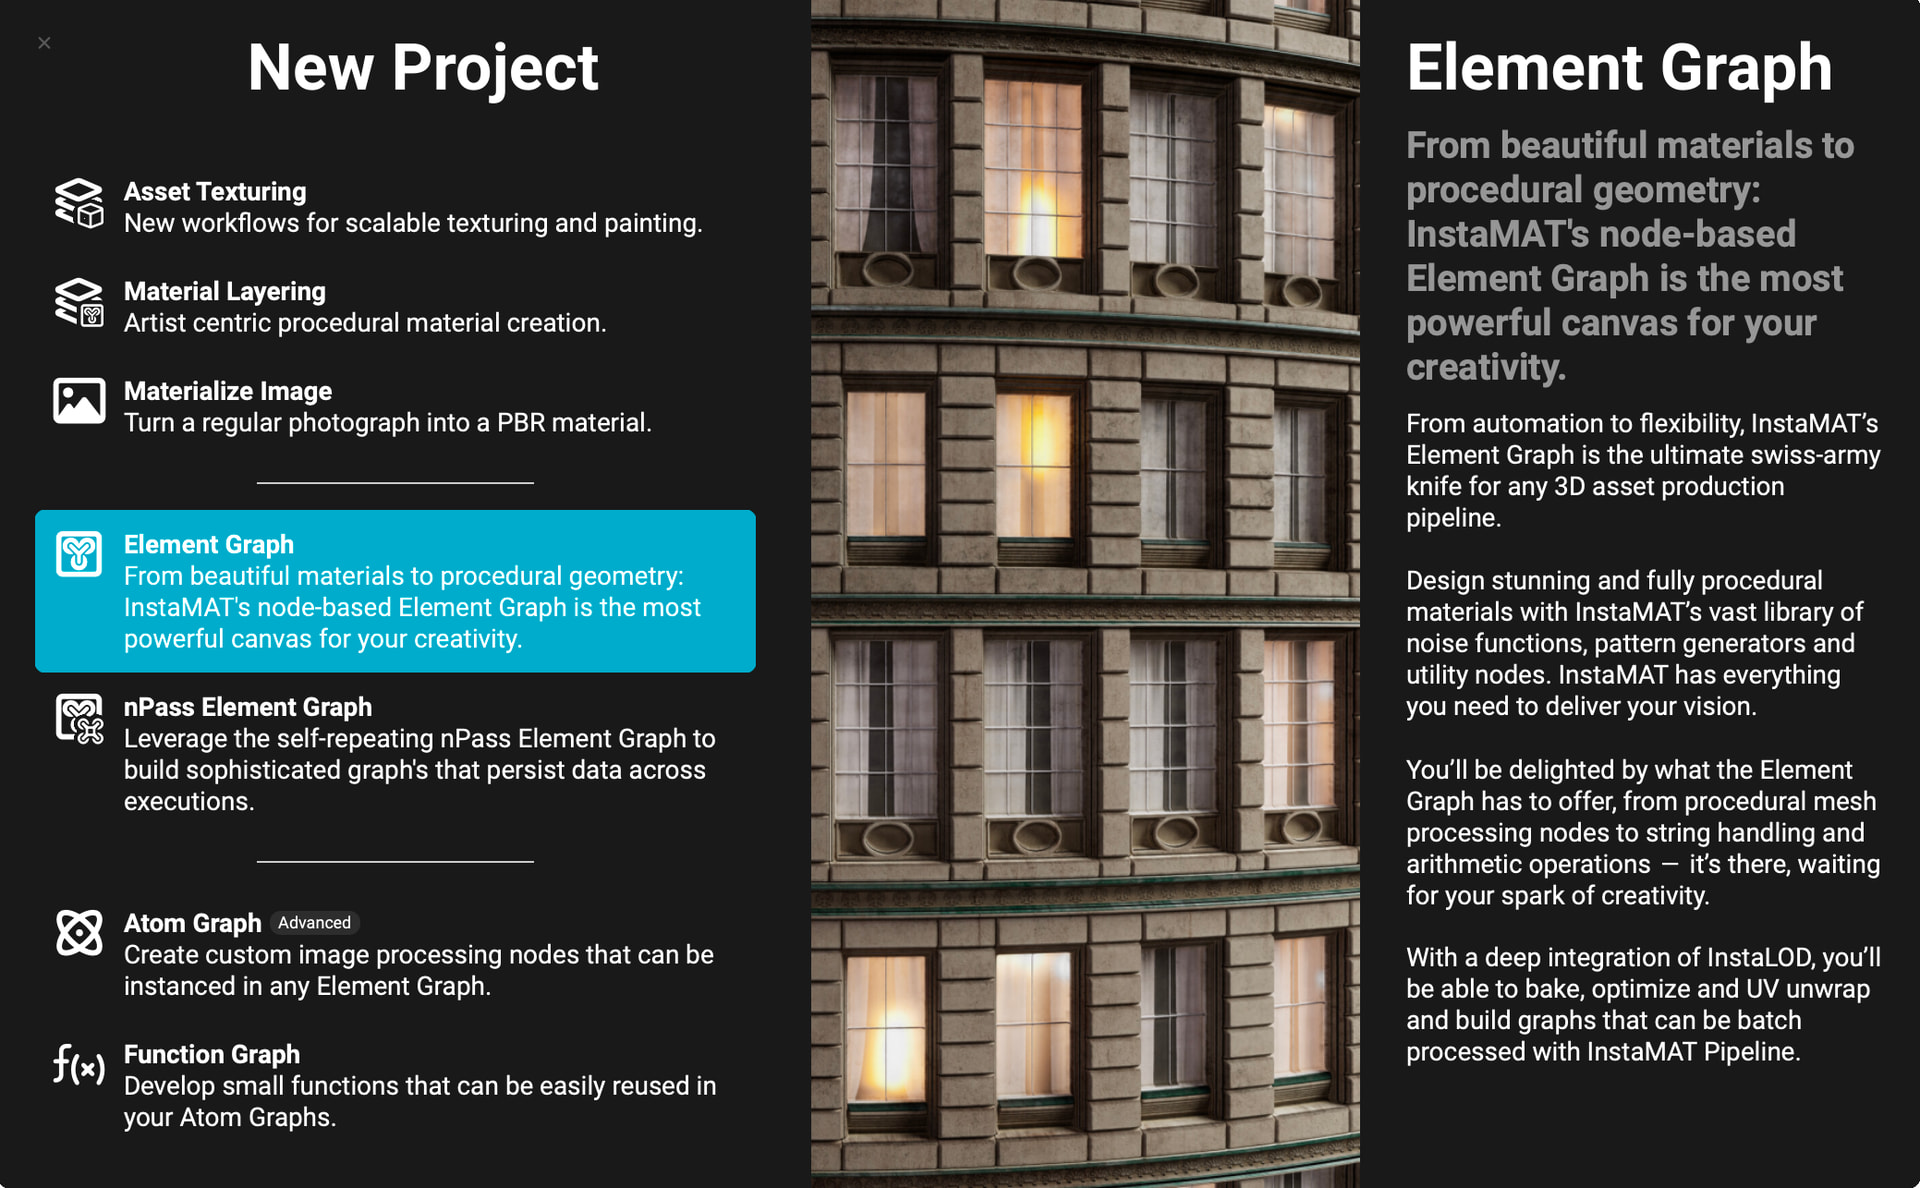
You can create a new graph project from the New Project screen by clicking “Element Graph”. This will create a new Element Graph project inside the package you are currently working in.
You can locate all of the projects in the active package in the Package Management panel on the left. You can also have both projects open at the same time in tabs to switch between them.
To do what I mentioned above, you can create a new Element Graph project and drag and drop the mesh into the graph. You can then add new nodes with Spacebar or use the MAT Library panel on the left.
To get started working in the node-based workflow in InstaMAT, I’d recommend watching this video first. It outlines a lot of the fundamentals. Also, here’s an article on how to export meshes from a graph.
Also don’t hesitate to reach out here if you have any further questions on specifics. We’re here to help!
Thank you. This basically worked for me, but there is a small “issue”:
My mesh has some submeshes that use the same UV map, but their UV islands overlap with the other submeshes’ islands. This is not a problem normally, because all have different materials.
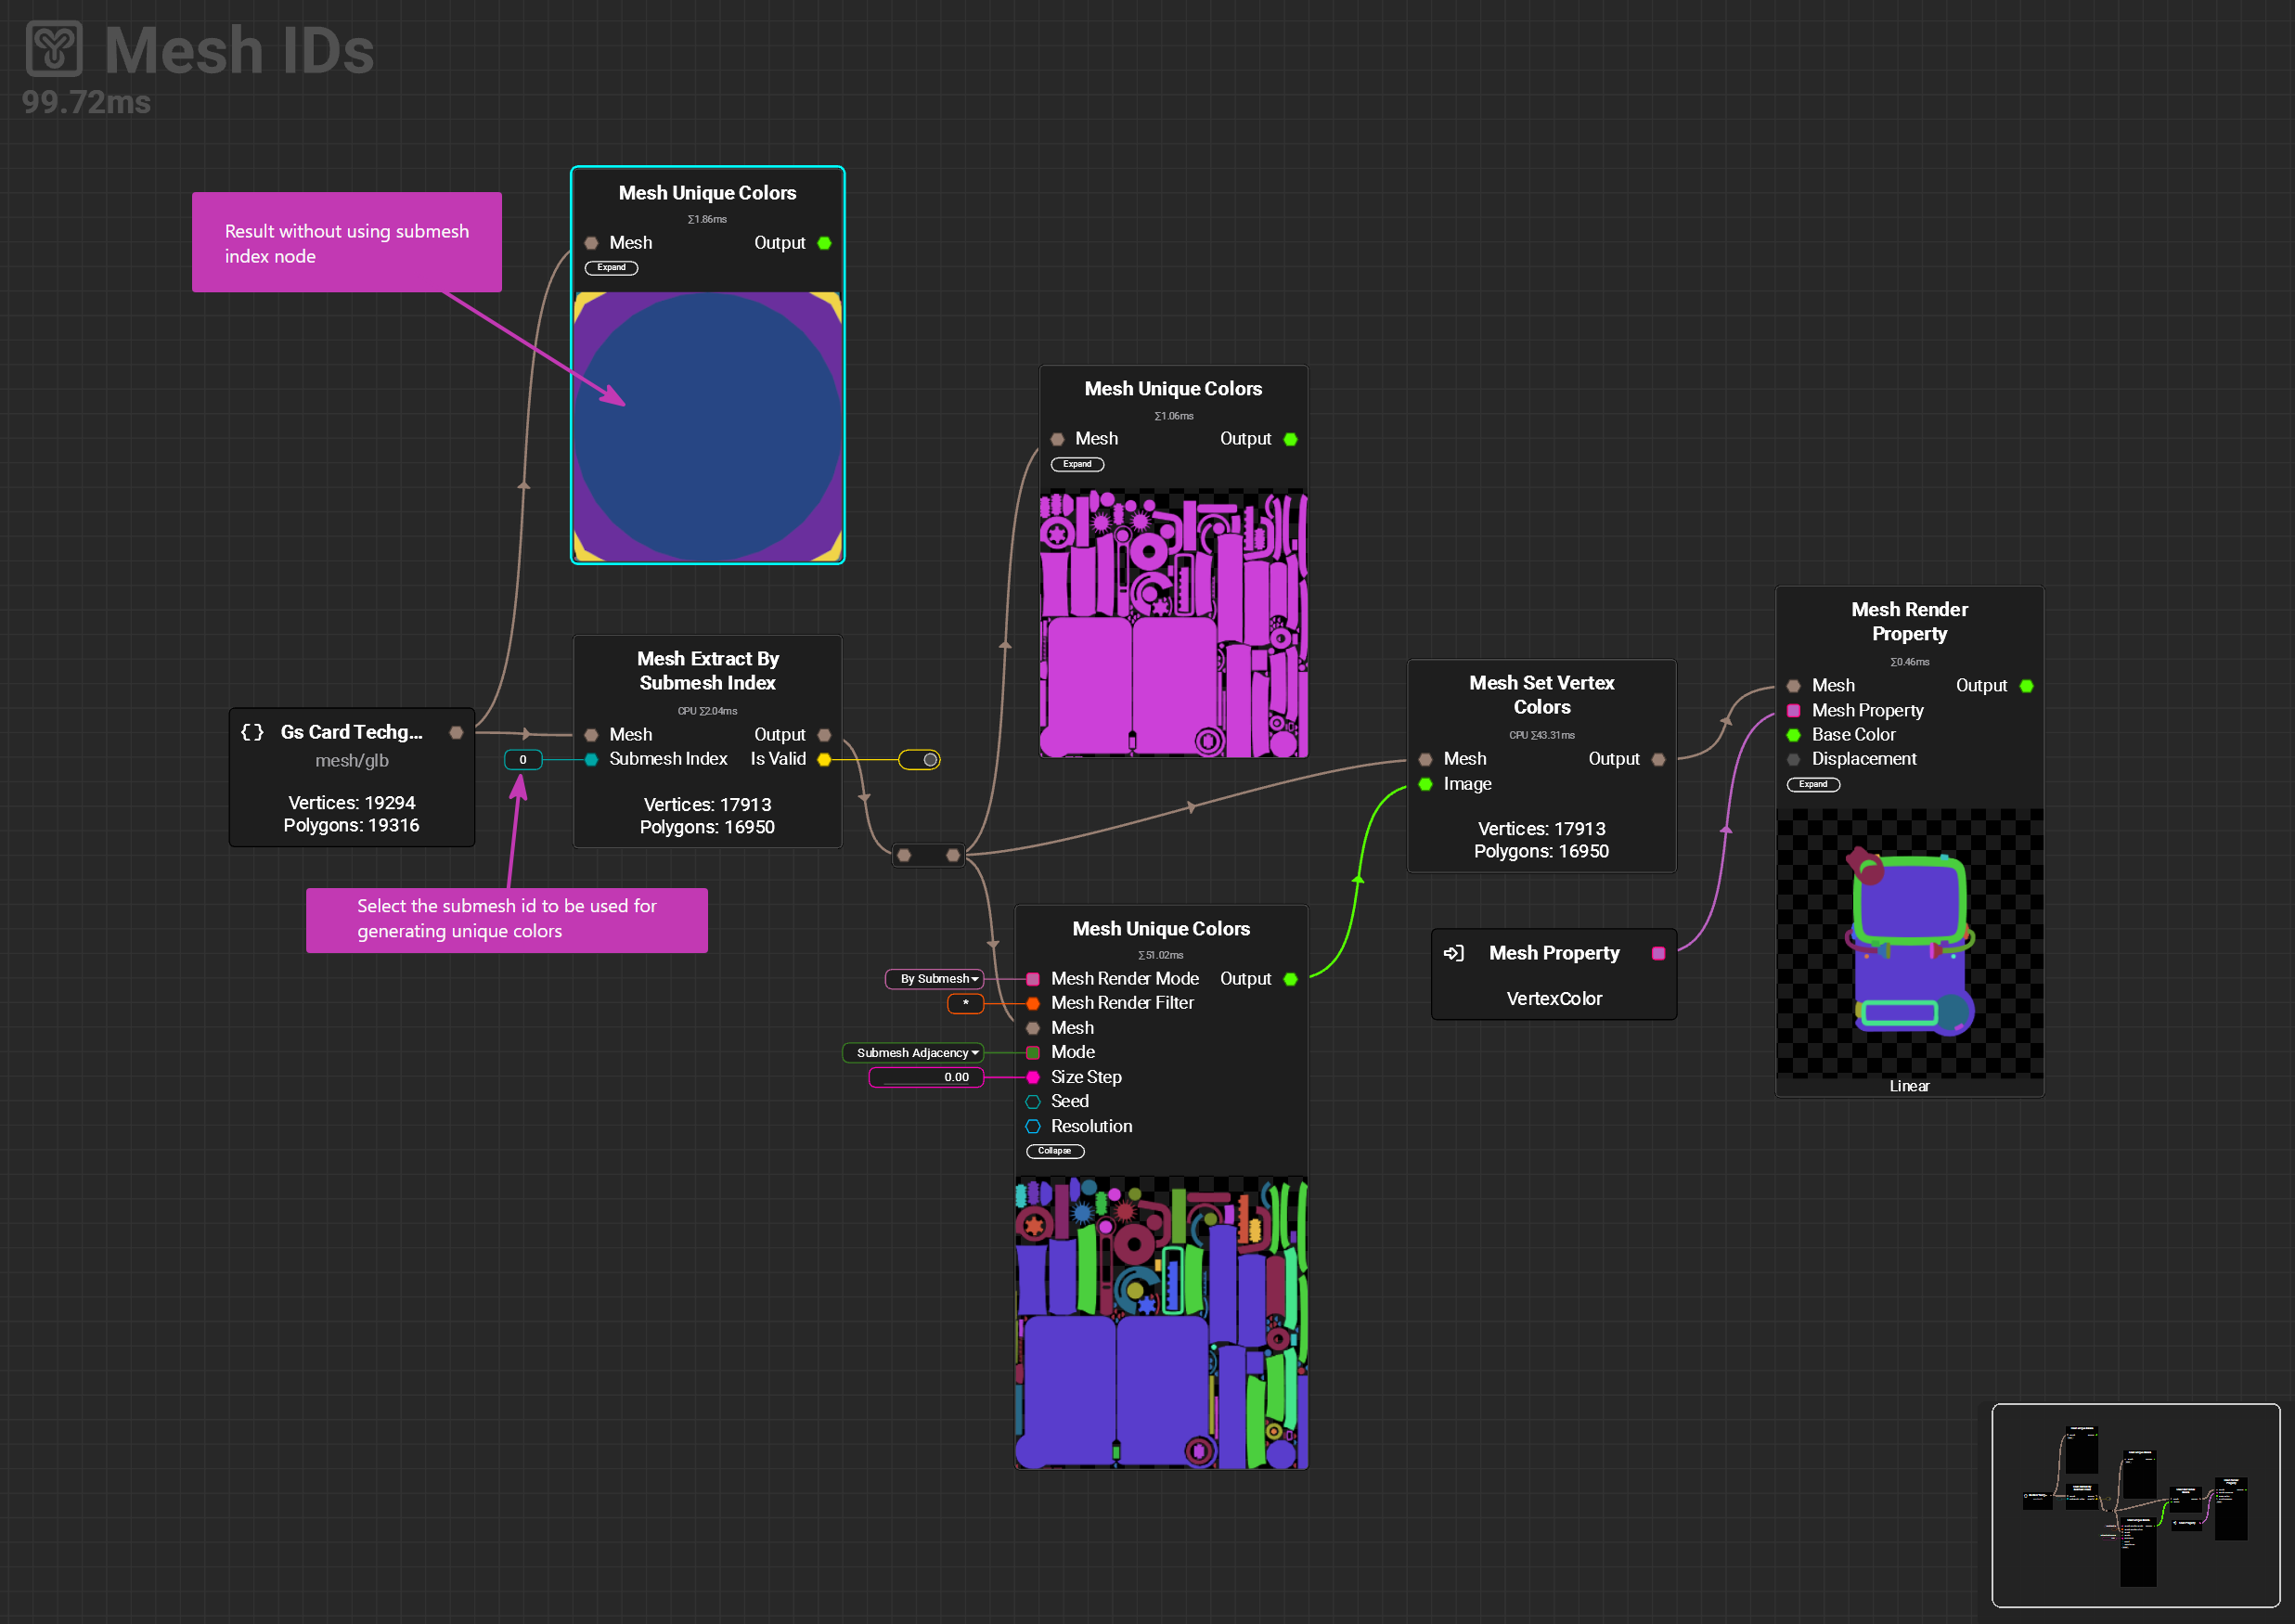
But this causes issues when using the mesh in the element graph. The mesh is handled as one single object , and all the UV islands overlap with each other.
Is it possible to restrict which subobjects are used for the Mesh Unique Colors / Mesh Set Vertex Color nodes?
I’m glad you were able to find a solution with the Mesh Extract By Submesh Index node. As for baking, you could:
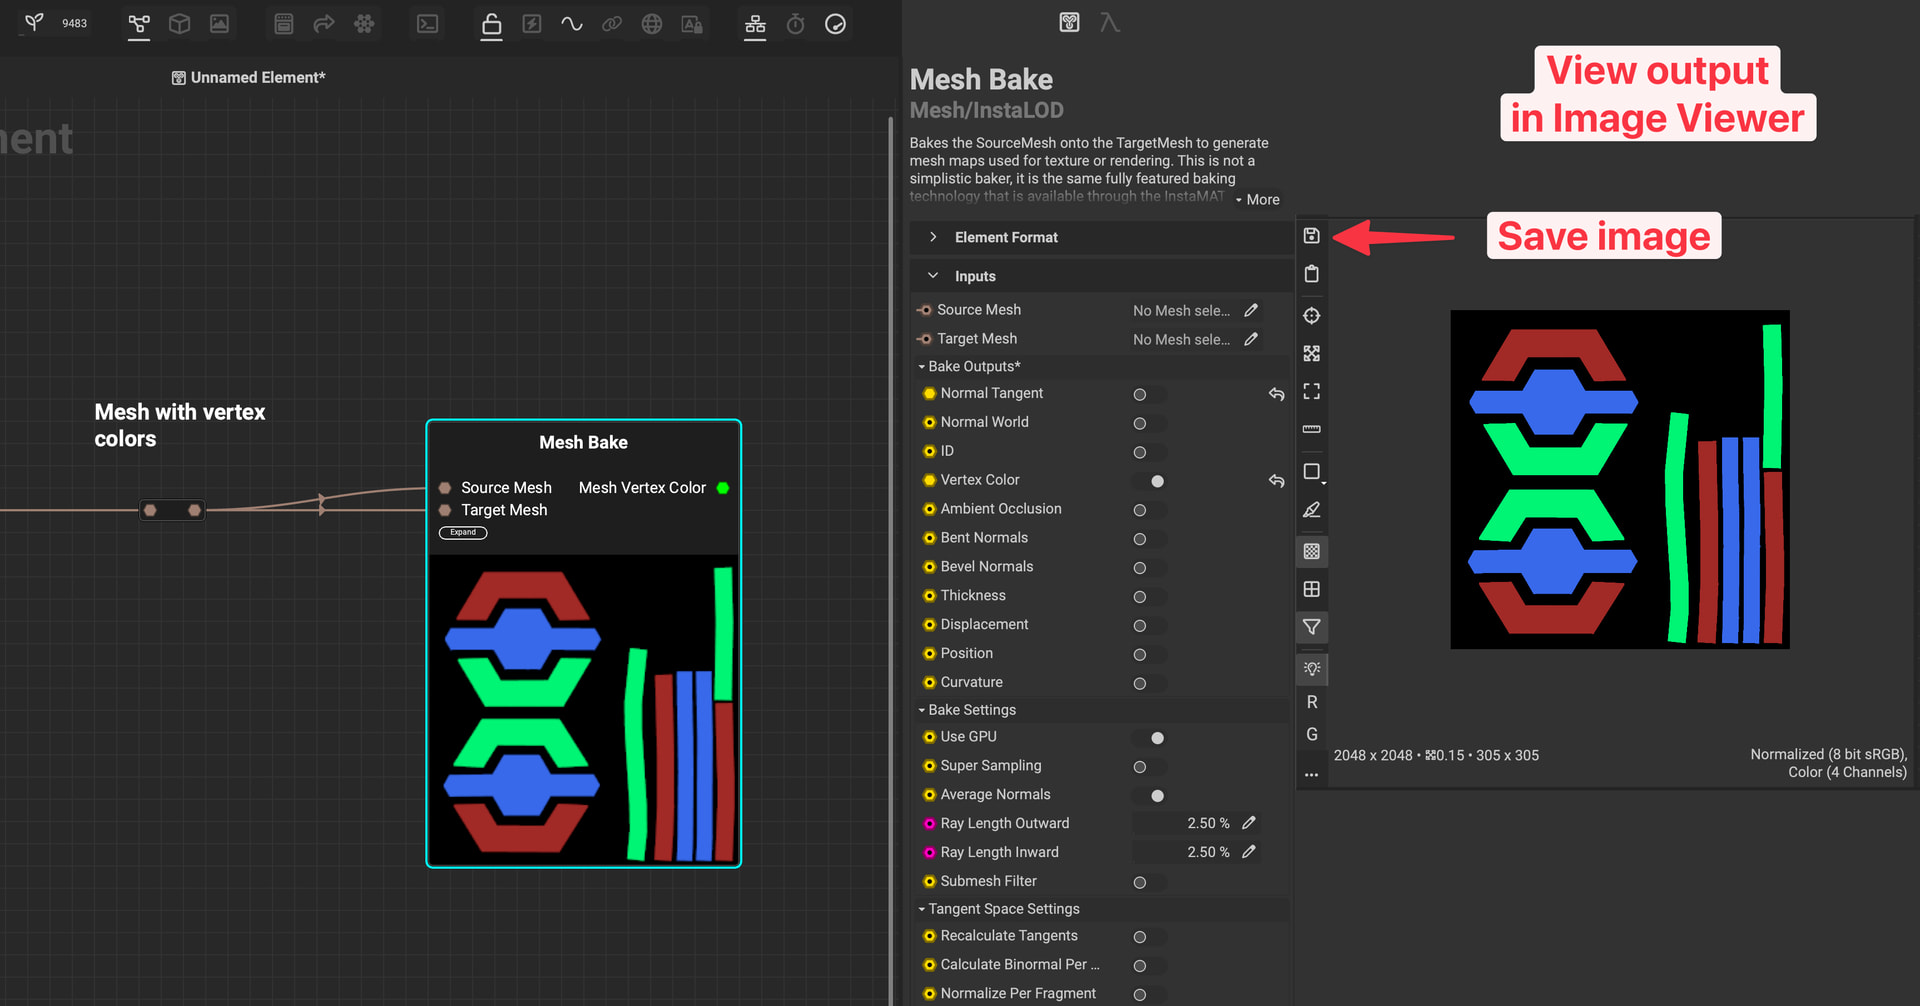
Use the Mesh Bake node and set it as both the source and the target input. Enable Vertex Color, and export the image from the output of that node to use in the Asset Texturing project by importing it into the package and assigning it in the Layering Project Editor panel.
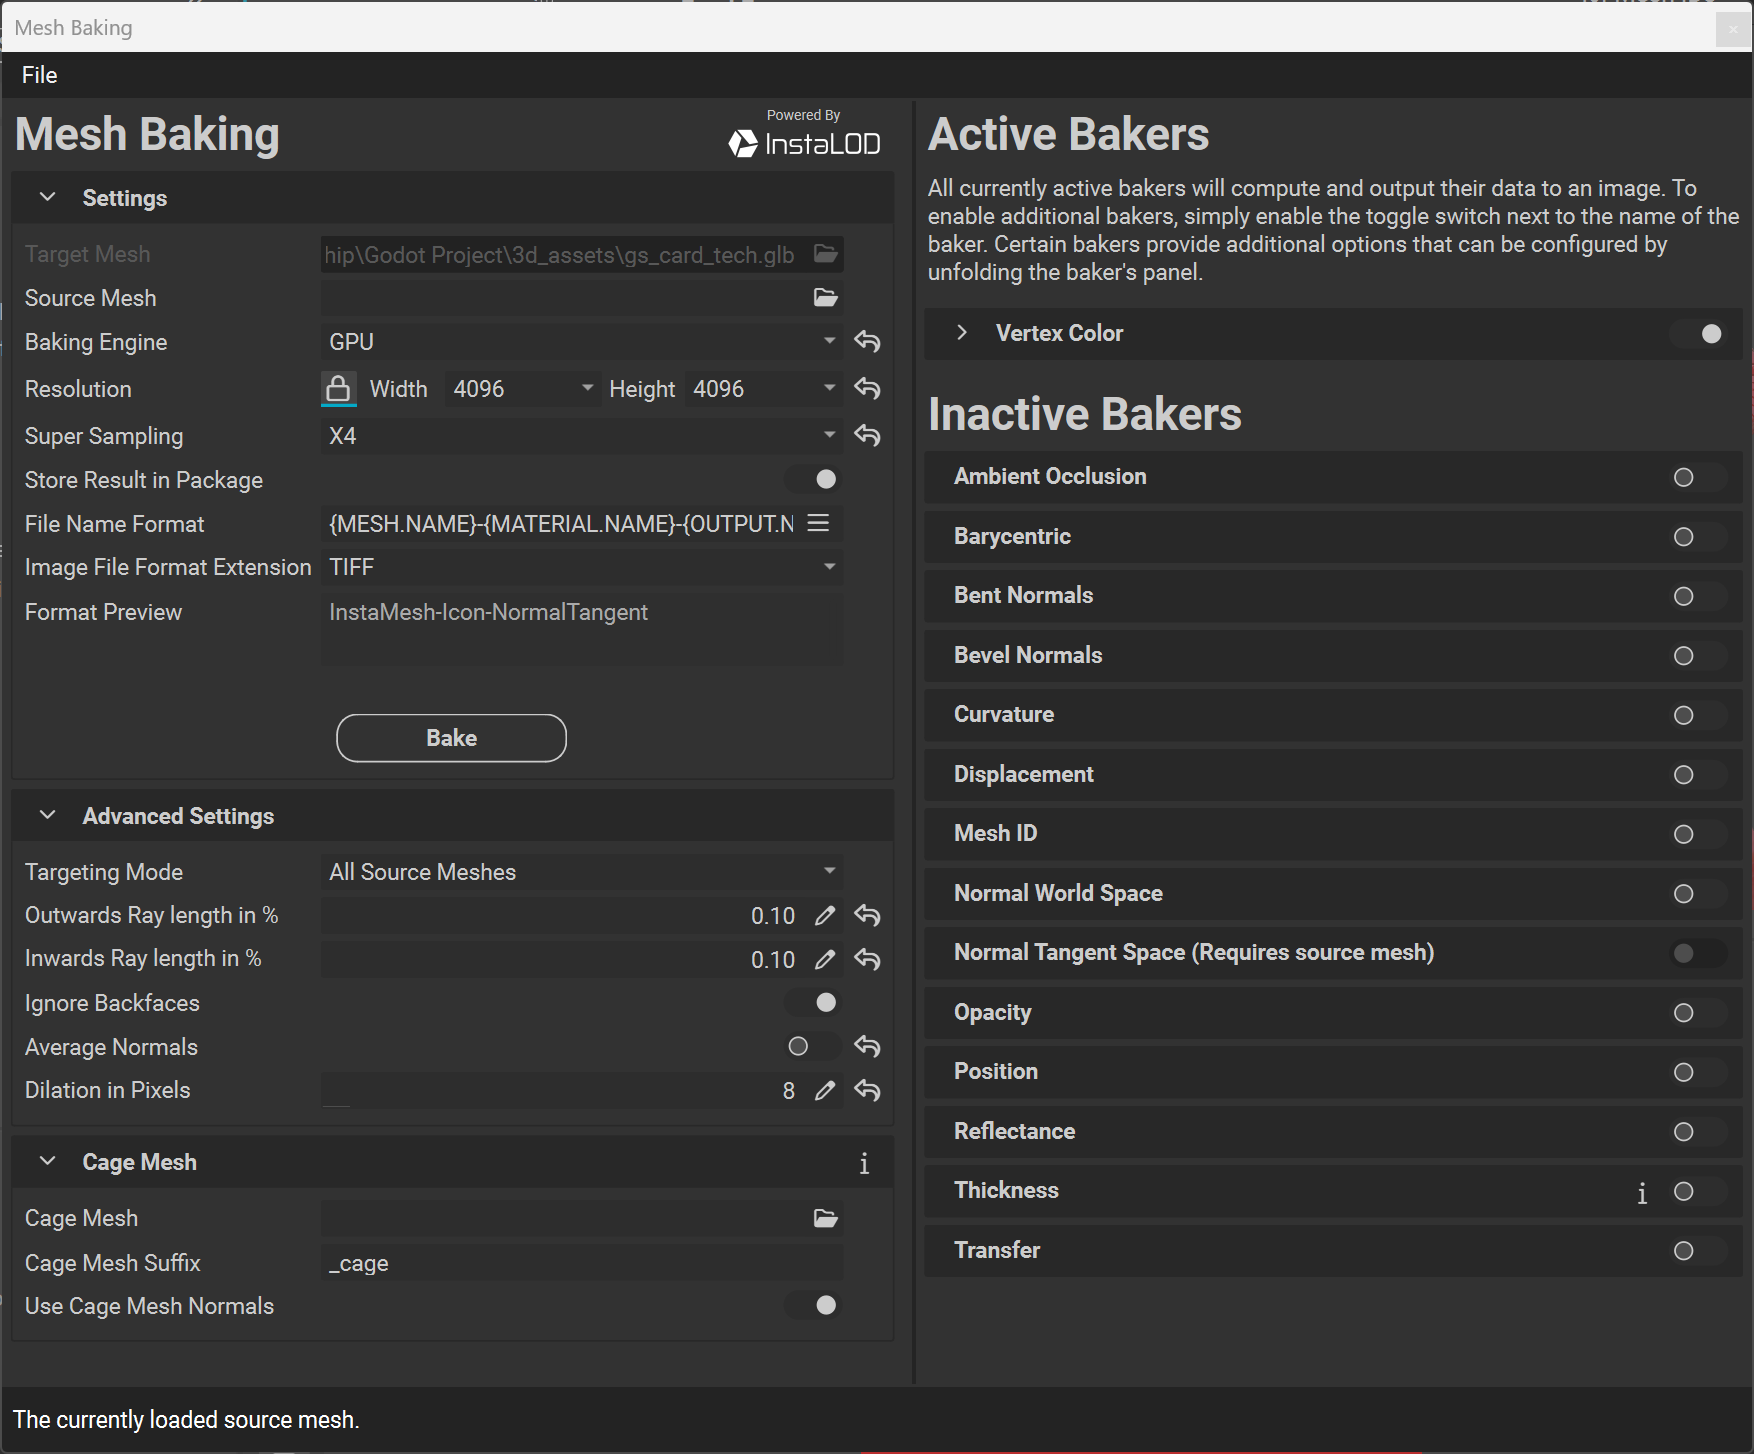
Export the mesh with the vertex colors assigned from the Mesh Set Vertex Colors node by viewing the mesh output from the node in the 3D viewport and exporting it using the similar Save button in the viewport’s toolbar. Then baking it using the baking panel.
You can also automate further by creating graph outputs for either the image result of the Mesh Bake node, or mesh result from the Mesh Set Vertex Colors node. Then you could use the Output Export dialog to export the files that you can then import into an Asset Texturing project.
Currently there isn’t a way to supply an Asset Texturing project’s mesh with an Element Graph, but the team is looking into workflows like this.
Hope this helps and as always let us know if you have any questions!